Technique Tuesday: Dirty Brush Holder
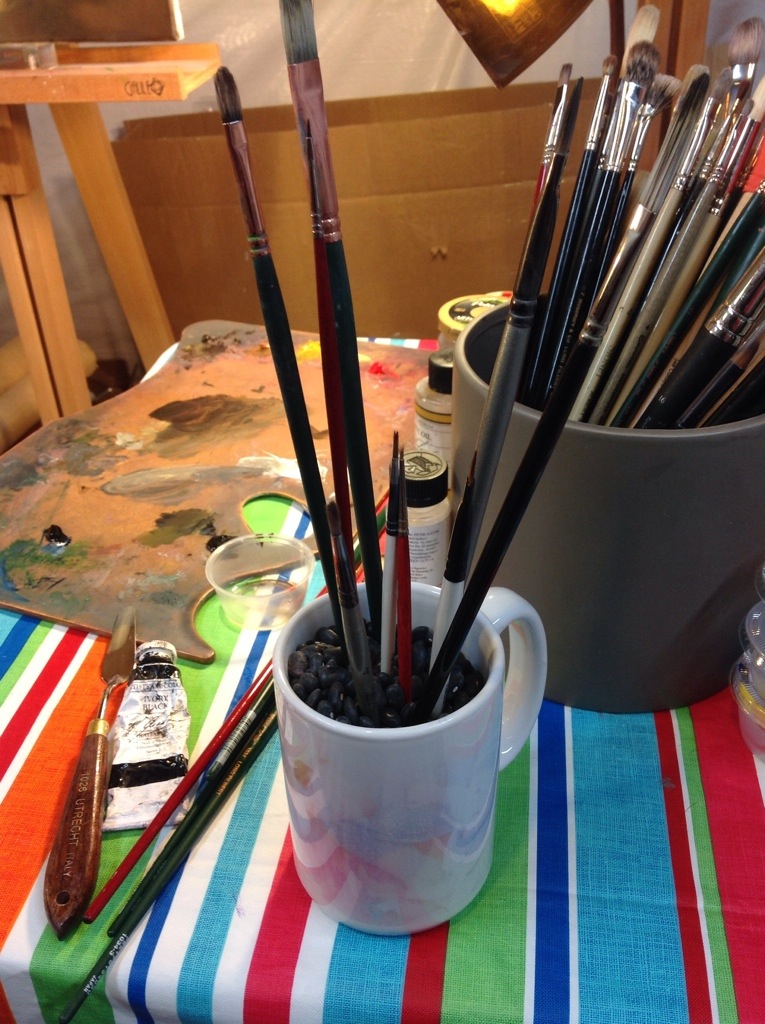
I came across this Technique Tuesday "hack" recently when I discovered the amazing alla prima portraits of Felicia Forte on Instagram. A student of hers brought her a bag of dried beans one day and suggested that she use them to hold her dirty brushes in place while painting. I saw that post and said "Eureka!", most probably out loud, and then ran upstairs to my pantry where I had stored many bags of dried black beans (a must in any Cuban American kitchen). I chose to use an old but cherished mug which features a ghosted image of my Mom and son as my new dirty brush container. My Mom was the one who taught me how to make black beans the traditional way--so it seems only fitting.
Technique Tuesday: David Cheifetz Workshop Notes
"Paint with paint"
The mantra most frequently uttered by the masterful David Cheifetz at the 3 day painting workshop I recently participated in was simply, "Paint with paint". And David really meant it. In his demos his brush or palette knife was always fully loaded with a glob of yummy paint every single time he touched his canvas. We quickly discovered that he wanted each of us to do the same.
It was such a frequent utterance that fellow painter J Lyndon Douglas cheekily observed, "Amazing that paintings are made with paint. I think what I have been producing until now could be called smudgings." After laughing and probably snorting at his statement, I realized that J was really on to something. To see the amount of paint David Cheifetz skillfully uses while painting is a true revelation. Anything less just looks flat & lifeless in comparison. It has me very much rethinking how much paint I use in my own paintings, or smudgings as J would say.
Here are my personal notes from the workshop to share with you all. Many of these concepts were new to me. Enjoy!:
-Emphasize the values in your primary subject and dilute them everywhere else. You want your darkest dark and your lightest light on your primary subject.
-When setting up a still life, contrast secondary objects by picking darker subjects against the light of your primary subject. Always think dark vs. light.
-Think groupings. Don't scatter your subjects too much so or else they will compete against each other.
-"I always go for fear in a painting. If you are uncomfortable about something in your painting that is a good thing, it pushes you. Try to have at least one thing in each painting that makes you feel that way."
-Before you start a painting get a clear mental picture of what you want to paint. Sit, stare at it. Imagine it completely in your head the composition, area of focus, values and edges. Then begin to paint, and only then.
-Think surface/fabric. Do the folds add to your area of focus? If not take them out. Simplify.
-Make sure the light is directed on your primary subject.
-Example: When painting a ball of yarn, subdue any strings that leave the main form (skein). It should not compete with the ball of yarn itself.
-Example: Killing an apple (secondary object). Subdue it by not rendering it as well, more flat. Subdue chroma, value, everything.
-Your set up (composition) is just a tool for your narrative. Don't feel chained to it if it is not right.
-Cheifetz prefers to paint small. Mostly 9 x 12, 8 x 10 or 11 x 14.
-He sets his palette up from transparent colors to opaque. His colors include (but not in order): ivory black, phthalo blue, ultramarine blue, alizarin crimson, cadmium red, cadmium orange, burnt umber, raw umber, yellow ochre, cadmium yellow, cadmium lemon and titanium white.
-You want your lights to be painted in mostly opaque colors because they attract the most light rays visually.
-Begin your under drawing by getting in the abstract shape of the shadows.
-Indicates the table line. Positions objects within the composition by making vertical and horizontal marks.
-He prefers compositions that are eye level. They elevate ordinary objects by bringing it to a "human scale".
-He prefers to paint on a dry panel (no oiling in).
-Use enough medium to be able to draw. Prefers Gamblin's Megilp.
-A tip on drawing straight vertical lines by hand: Make micro adjustments back and forth as you lay down the line. The overall impression will be a straight line.
-Jumps right into massing the objects & shadows (like an open grissaile). He immediately moves into his lights with color (direct painting) working first on the highlight of his main subject and moving out from there.
-Put one or two generous strokes of paint before changing colors. PAINT WITH PAINT!
-Paint your backgrounds as lovingly as your objects.
-Lays his color down with filberts in long tiles.
-When painting a portrait, pick your area of focus and then let everything else melt out.
-Begin your painting with your subject and end it there.
I want to personally thank our host for the workshop, artist Tricia Ratliff of Agile Arts Atelier for conceiving this workshop and inviting me to participate. And thanks above all to David Cheifetz for his exceptional instruction and the individual attention he gave to each of us. I'd like to also add that David hosts his own awesome podcasts called The Impasto Logs that are all about painting and are especially wonderful to listen to when painting, or smudging.
Technique Tuesday: Cleaning Up Your Act {and Brushes}
Last week I brought you Teresa Fischer's tip to clean your brushes with walnut oil. And because I had begun to hear similar things from other artists and because even Rosemary herself of Rosemary & Co. recommends cleaning your brushes with oil, I had decided to try it for myself. Then last Friday at my weekly class with Rob Liberace, my art cohort Carter Corbin brought in this product called Jack's Linseed Studio Soap and offered to let me try it. When I looked at the bottle I instantly remembered that I had a little sample of it waiting for me at home that I had never opened. So thanks to Carter, I then did something I never do after workshops & classes, I actually cleaned my brushes. It was such an amazing experience with this product! It is all natural, made simply of linseed oil & soap. And like conditioner on hair, my brushes eagerly soaked it in. I am proud to say I have officially reformed my ways and now clean my bushes everyday with a combination of Teresa's technique (wiping the color off with oil in between uses) and then using Jack's Linseed Studio Soap at the end of the day to thoroughly clean them. Goodbye stinky, toxic OMS! Turns out I never really needed you after all.
I want to thank Teresa & Carter for opening my eyes to this new Technique Tip and also Susan Gallagher O'Neill for serendipitously picking me up a large bottle recently at our local art store. I have the best art friends!
Technique Tuesday: Teresa Fischer's "Go To" Brushes and Brush Cleaning Method
One look at Teresa N. Fischer's paintings and you know you are seeing something revolutionary in the field of still life painting. Her theatrical and witty compositions are often clever observations of childhood experiences, inferred by the juxtaposition of antique toys and other still life objects. One has only to look at her painting "Peculiar Pachyderm", one of my all time favorites and a finalist in The Artist Magazine's 30th Annual Art Competition, to feel and see the magic in her work.
Teresa is a graduate of the Savannah College of Art and Design where she met her husband, the illustrator Scott M. Fischer. She is an award winning member of both the Oil Painters of America and the International Guild of Realism and has been a finalist many times over in the Art Renewal Center's, International Salon.
I had the immense luck of meeting Teresa several years ago and instantly found a nurturing and supportive friend who was willing to share her experiences with me, have studio chats via Skype and even meet for dinner on the occasion she's in town for one of her openings at the Principle Gallery in Alexandria, VA.
In keeping with Teresa's generous spirit, she is actually sharing twoTechnique Tuesday tips with us today! Hooray! Here is the first:
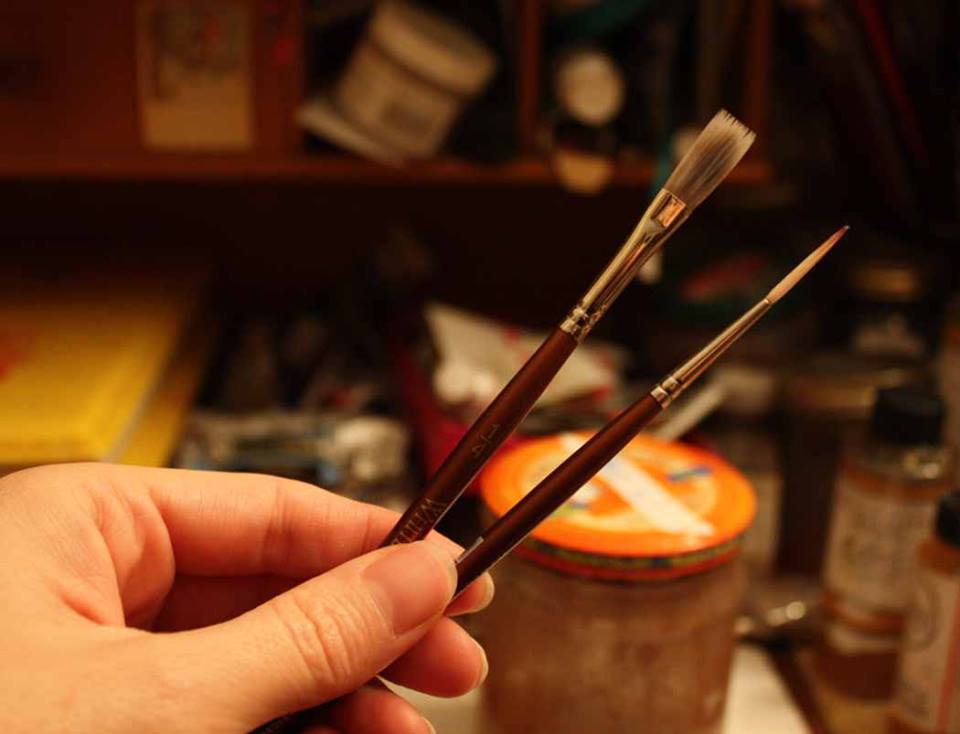
"These are my two favorite brushes that I use. Robert Simmons white sable series 721 one strokes (a long bristled flat) and series 750 script (a longer bristle liner round).
I don't use a lot of small round brushes for my fine detail work. For me I find them difficult to use. They either don't keep their points which can be frustrating or hold enough paint. With the 750 script I can pull a very clean thin line, and the point gets really thin which allows me to do very tiny details. In this one brush I have a greater choice over the thickness of those details or their size.
Of the series 721 one strokes (flats), again I prefer the longer bristles. I like the spring of them. Shown in the picture (above) is the 1/4", my other favorite size is the 1/2". This is my work horse brush. I lay almost my entire underpainting with these two sizes. I can block in bigger areas and turn it on edge and drag a very nice clean line. I find that very versatile. If I get too caught up and tight, I grab the one stroke and start blocking and chiseling the form. It feels more like I am sculpting with paint.
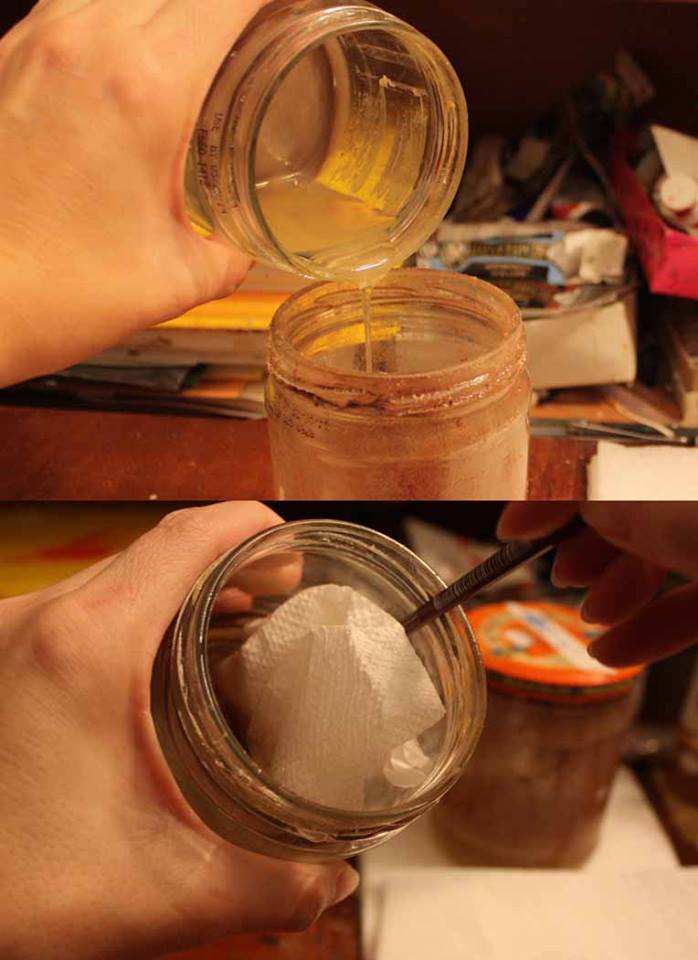
The other thing I do is I rarely use turp to rinse my brushes. During a painting day I use walnut oil to rinse my brushes. Mainly to try to be healthier and my brushes seem to like it. At the end of the night, I give them a rinse in turp or OMS, them wash them using either Masters brush cleaner or even Palmolive dish soap. Because the walnut oil is a little more expensive I don't want any to go to waste , so I utilize the two jar system. After the oil settles, the oil and sludge separate.
I then carefully pour the clean oil off into a empty jar. I clean out the sludge that is left with a napkin and the end of a brush handle to swirl it around with. And as you can see, my favorite jars to use in the studio is salsa jars."
Thank you Teresa for sharing both these wonderful tips and your amazing art work with us today!
Teresa's painting, "Carrot - O" was recently featured at the 15th Anniversary Show at the Elliott Fouts Gallery in Sacremento, CA. Here is a link to her really informative blog post detailing its creation. Enjoy!
Technique Tuesday: A Value Tip From Artist, Carrie Waller
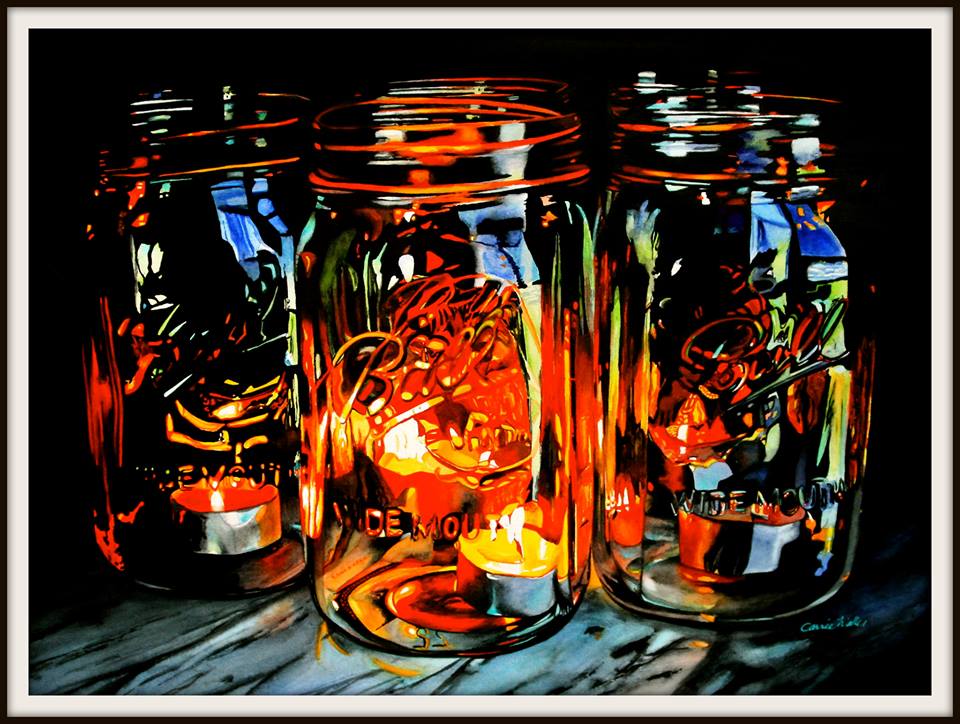
One of the highlights of 2012 for me was definitely striking up a friendship with artist, Carrie Waller who is part of my "artists mentoring group". This special group of 8 female artists meets once a month via video conference to discuss the best practices and approaches to the business side of our art careers. There is a lot of about Carrie that I admire. Besides being an award winning, internationally recognized watercolor artist, she is also a military wife and mother to two young sons. Carrie's work is known for being bold, dramatic and full of light and color. She has had art published in Watercolor Artists Magazine, Pratique Des Arts (France’s #1 art publication), Splash 14 and several local publications. Most recently she won the grand prize for Daniel Smith’s annual competition, a prize worth $10,000. Carrie is a guest co-host on Artists Helping Artists the #1 art blog radio show. She is a signature member of the Louisiana Watercolor Society and has her art in collections around the world.
Here is Carrie's Technique Tuesday tip in her own words; "I'm often asked what medium I paint in because my paintings don't look like the stereotypical watercolor painting. My intention since I began painting in watercolor, was to push the limits and see how bold I can go with color. My biggest tip for watercolor artists and artists in general is to make sure you are going dark enough. Whenever I see a weaker painting 9 times out of 10 it's because the values aren't dark enough. To achieve my darkest darks in watercolor I use a mixture of Daniel Smith watercolors Indigo and Sepia. It creates a beautiful rich dark that is flat and not shiny."
Carrie's tip really got my attention because I recently had the same epiphany in my alla prima painting which I discovered from taking regular classes with Rob Liberace. In order to paint expressively with minimal brush strokes in the alla prima way, your values must be spot on. This lesson hit home for me recently while working on the background of my recent commission. I had painted this haystack beautifully with minimal economy of brushstrokes, only to find the value was off which was forcing the haystack too forward and taking away from the importance of the principle figures. So I had to scrape the paint down and begin all over again. In class Rob will often say, "There is no color that is wrong, only the value". Now I truly understand what that means.
Thank you Carrie for sharing this very important Technique Tip with us today.
Technique Tuesday: Podcasts
One of the best weapons in my arsenal to fend off insanity while working on lengthy commissions is to listen to podcasts. Let's admit it now, those details in a painting that are so pretty to look at are sometimes a pain to paint. Podcasts can help you get through it. Here's a list of links to my current favs. Check them out, you may find one or two that are new to you. You can find most of them on iTunes or by going directly to their site and subscribing to them. Lastly, I should mention that I only pick podcasts that are around an hour long. I don't want to waste my time hitting play often.
1. National Gallery of Art Lectures on art history, artists and exhibits at the National Gallery of Art.
2. NPR: TED Radio Hour The inspiring Ted Talks but curated around a theme which lasts one hour.
3. WAMU-FM: WAMU: The Diane Rehm Show Topical interviews on politics and culture.
4. NPR Programs Fresh Air More topical interviews on politics and culture.
5. Impasto Logs with David Cheifetz Painter David Cheifetz shares his take on the practice of painting.
6. Sidebar Nation Highly entertaining interviews and discussions about everything in the comic & animation worlds. Past interviews have included James Gurney and William Wray.
7. Artists Helping Artists Discussions surrounding art marketing, boosting your sales and on-line presence.
8. Art Share Fantasy world artists/Illustrators and writers share the tales of Cons and the industry in general. Humorous panel of hosts.
9. Hush- Topeka and Shawnee Co Libraries A great podcast showcasing writers and genres of literature introduced by entertaining librarians.
10. Artist Mentors On-line A good pod cast on painting that has some heavy hitters for interviews including Jeffrey Watts, CW Mundy, Tony Pro and Rose Frantzen. However the hosts remind me a little (OK, a lot) of this cult classic SNL sketch.
Do you have a favorite podcast you'd like to share? Please leave the link as a comment. Thanks!
Technique Tuesday: A Tip from Elizabeth Floyd
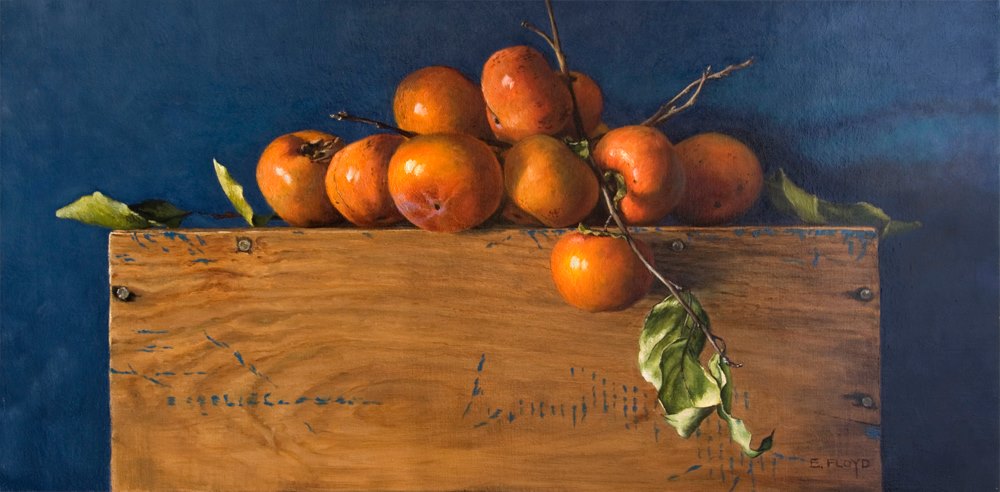
My wonderful friend & painter, Elizabeth Floyd is the talented artist behind the "Bountiful Observations" series of floral still lifes and the creator of the beautiful persimmon painting above. She also writes a really awesome creative lifestyle blog which you can subscribe to here. Her lovely paintings will be included in the Small Works 2013 show at the Principle Gallery in Alexandria VA in December. Elizabeth has graciously agreed to share this Technique Tuesday tip with all of us today:
"My tip that I find invaluable is that I like to use spice jars that have a metal lid when mixing my batches of medium. I have found that these spice jars are the best because it is always better to mix small batches of medium and the threading of the metal lids are some of the best available. Baby food jars do not work well over the long haul because the lids do not have quality threads and deteriorate over time."
Thank you Liz for allowing me to feature your tip today! This is one that I for sure will start incorporating into my studio routine.
And to all of you in the States, especially to our service men & women abroad--may you have a Happy Thanksgiving!
Technique Tuesday: Walking Canes Ain't Just for the Infirm
I stole this Technique Tuesday tip a couple years ago from master painter Richard Schmid who famously uses his walking cane as a mahl stick (to steady your hand in painting). I have even taken it with me to workshops and have had people laugh at me and say "I was looking for the old lady when I saw that". To which I have answered while shaking my cane in their face, "He who paints like Richard Schmid can cast the first stone!". Then I smash them over the head with it. See, it serves a dual purpose.
I also have another Mahl stick I use when traveling or copying at the National Gallery of Art. It is affordable, collapsible and very sturdy (made out of aluminum). Although don't drop the threaded end on a hard concrete floor as I did, or you may have a problem putting it back together again. You can purchase it at most art supply stores. Here is a link to one.
Technique Tuesday: Unique Toolz
Here's a quick little Technique Tuesday post. Like any artist, I love my gadgets, especially those I find in non-art stores. I bought this cool little magnetic clamp at my local WoodCraft store for under $5 and it is PERFECT for keeping my palette knife out of the way when I am painting (and for opening paint cans). Thanks to this little impulse buy I can now keep my taboret relatively tidy which is a real plus because I can be quite a hot mess when I paint.
Jonathan Linton's "White Test"
Today is Wednesday and for the second week in a row I have forgotten to do a "Technique Tuesday" post. In my defense I actually just have a lot excuses. My son has been home for 3 days with a fever, my husband is home in between contracts, I have not had coffee for 48 hours and I have a major commission due which I hope to share shortly. All the above issues = comatose brain cells.
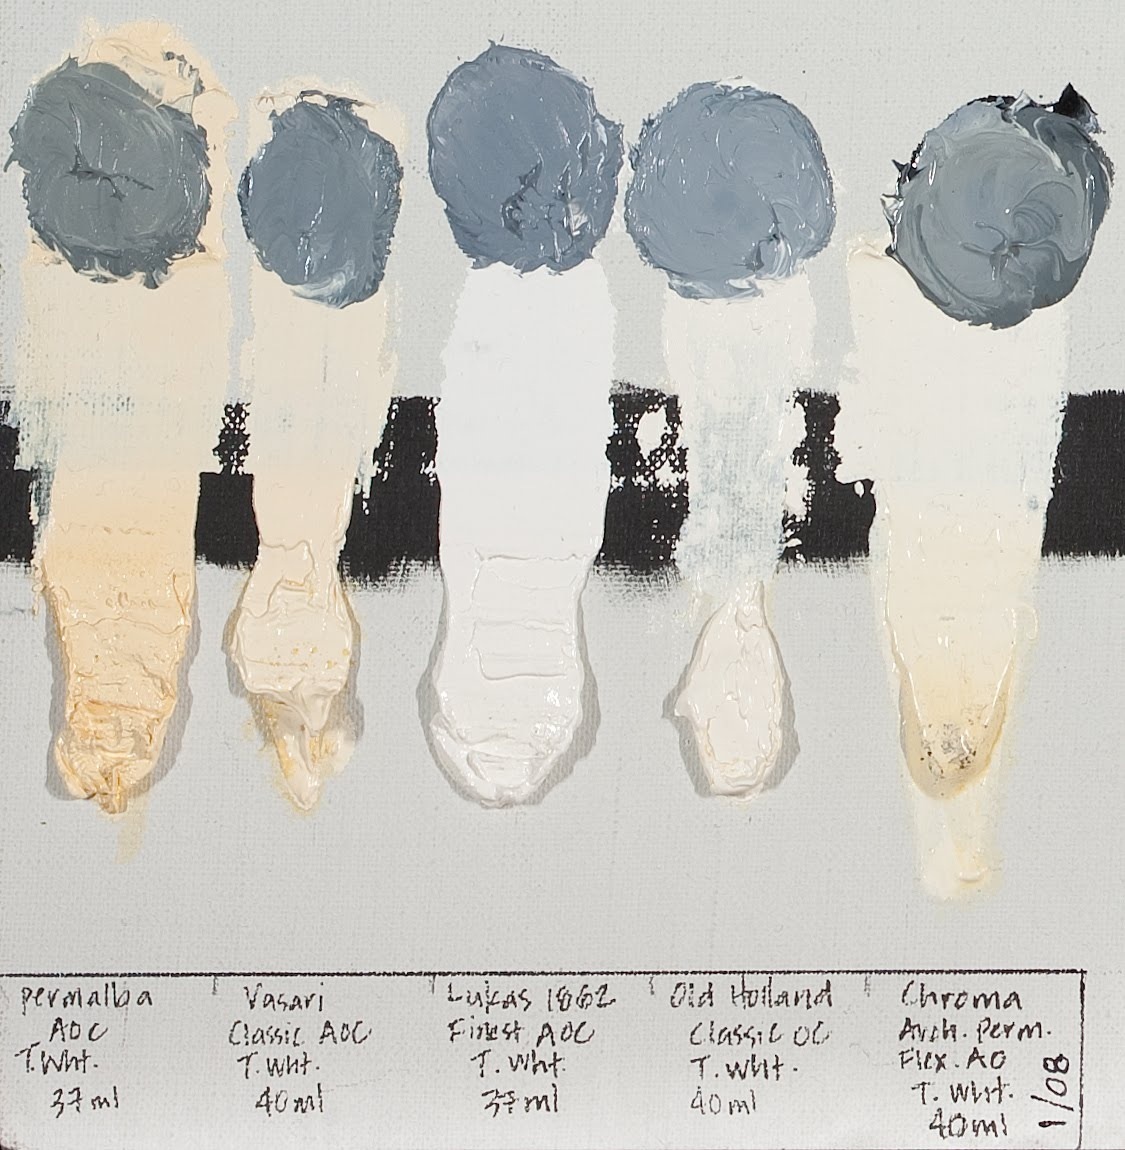
But I do have one extraordinary technique tip to share with you today. My good friend and mentor, Jonathan Linton created years ago a "White Test" where he systematically tested various oil painting whites (and whites mixed with black) and then left the entire test in a window for 2 years to see what happened to them and help figure out which was the truest white over time. Think of it as an art nerd's Survivor Island.
For a complete list of the whites Jonathan used check out his original post from 2010 (above) which has been featured on other blogs including Gurney's Journey and most recently on Muddy Colors. Then see if you can figure out which white is the great survivor--and be sure to use that knowledge in your paintings going forward.
Technique Tuesday: Debra Keirce, Miniature Art and the World of Tiny Tiny Brushes
One of my earliest memories of art is of my Aunt's miniature portrait, painted of her while she was a young woman growing up in Havana. I was completely fascinated by that painting, by its scale, by its highly realistic rendering, by the simple IDEA of it. I think that early memory has always been somehow in the back of my mind as I became an adult and an artist.
Flash forward to now. I have a good friend named Debra Keirce who is a very accomplished artist and specializes in miniature fine art paintings. Ever since I have known her she has tried to recruit me to the miniature art world. And I will admit the temptation has been there, to at least dip my toes in it, all because of my Aunt's portrait.
Contemporary miniatures are often defined as being less than 25 square inches and smaller than 1/6 original subject size. Some societies and shows define them as being smaller than 8"x10 or 12" in any dimension. All require a tightly rendered artwork such that it appears similar to a much larger painting when viewed under magnification. This is why most miniature artists, Debra included, use 5x to 20x magnifiers while painting.
Debra has graciously agreed to answer some questions for Technique Tuesday for all of you who are also curious about making miniature art.
SLA: Can you please acquaint our audience with the origins of miniature painting?
DK: Probably not as well as Google can. But basically, miniature fine art started with the manuscripts produced by scribes in Renaissance Days... 1600's. With the advent of the printing press, miniature artists began selling portraits instead of text. Wealthy Europeans prized miniature portraits that fit in their pockets. When they were away from loved ones, they would keep their miniature paintings in lockets on their persons. This is where the tiny metal frames became popular. The advent of photography caused miniature art to undergo major changes, and is really where the modern miniature fine art societies, collectors and artists were born from.
SLA: Please describe the historical substrates, mediums & traditional techniques of miniature painting:
DK: I really am not so interested in history, unless I can use it today. Google can answer that question better than I. Modern substrates include polymin and ivorine, which are smooth synthetics meant to mimic ivory. Piano keys are often used. Feathers are sometimes seen in shows. Vellum made from animal skins is a popular surface. Most of us use smooth substrates like panels, dibond, artboard, illustration board.
Mediums used today have been used for hundreds of years, but obviously they have evolved over the centuries. Oil and acrylics, gouache and transparent watercolor, egg tempera, silverpoint and other metal points, gold leaf... These are all used in modern miniature paintings.
Traditional miniature painting techniques include cross hatching and stipple.
SLA: What modern techniques are being utilized by miniature artists today?
DK: Modern techniques vary a lot. Each artist finds their own way to adapt to the challenges of painting. I know artists who literally paint entire pieces in stipple, like a computer assembles images from pixels. Other will use a mische technique of painting in opaque and transparent layers. This is especially popular with egg tempera painters. Many painters use dozens of delicate glazes.
I can tell you what I do. I use acrylic or oil paint, and I typically first paint a grisaille underpainting, but often I will let some of my conte crayon drawing show through, along with some of the ground. I lay in the local color with a transparent glaze. Then I will paint the details and textures, but the whole time I will use an exacto blade and embossing tools to literally sculpt the paint and the top layer of substrate. In this way, I can achieve finer details and lettering. I like to paint on substrates like maple panels, illustration board, dibond, clayboard, artboard. Depending on the subject, I will choose a substrate with more or less give. Harder substrates are better when I want softer edges and less sculpting. Architecture is better on softer substrates that allow me to cut crisp edges.
SLA: What is your favorite painting tip you can share with us?
DK: My favorite painting tip is to paint what you see, not what you think you see. For me, the best part of the painting is when I go into a place of abstraction. I am painting the dark shapes, then the midtone shapes, highlights, feathering edges, etc. But I will not be thinking about the object. Instead, I am feeling the value changes, admiring the colors, sensing the light paths. Then, I step back and enjoy seeing the photo realism that sprang from that totally abstract experience.
SLA: Where do you buy your tiny tiny equipment for your miniatures, i.e. paintbrushes, frames etc?
DK: I buy paintbrushes from everywhere, but my favorites are Kalish, an Irish company when I have money, and Creative Mark when I need to budget. In either case, I prefer watercolor synthetic brushes...Rounds with very pointy tips are best. I like the number six rounds for most of my painting. I will pull in a quarter inch flat or a 20/0 liner on occasion. But mostly, I want a brush that will hold a lot of easy flowing paint and deliver alternately a very thin line or a thicker smudge.
I do my own mounting and wiring, but buy my custom frames from
. They are very reasonably priced, they have beautiful moldings, their workmanship is top notch, and they are one of the few frame suppliers with equipment suited to small miniature frames.
My magnifiers are lighted full spectrum lamps available at office supply stores, and I have several tabletop easels I use.
SLA: What miniature societies do you belong to?
DK: I am a signature member of The Hilliard Society at
http://www.hilliardsociety.org/nicholashilliard.htm
named after Nicholas Hilliard who was the official miniature portrait artist for Queen Elizabeth 1 in the 1500's.
My budget precludes me from pursuing membership in The Royal miniature Society, but it is the oldest of the miniature societies, founded in 1896. Here us a link to the history they describe on their site:
http://royal-miniature-society.org.uk/History.html
I am a signature member of The World Federation of Miniaturists and Miniature Painters Sculptors Gravers Society of Washington D.C. You are required to be part of the societies for a number of years, participate in a number of juried exhibitions and receive a number of awards to receive the invitation for signature membership. http://www.mpsgs.org/MPSGS-MemberSites.htm
I am also a member of the Miniature Art Society of Florida. I have not been a member long enough to meet the eligibility requirements for their Miniature Artists of America designation, but fully expect to be part of this prestigious group one day.
SLA: Feel free to showboat a little here. Where can we see your work in person? Where can we follow you on-line?
My website at
lists all of my social media contacts, newsletter sign up, current exhibitions, the galleries I am represented by, which include
in Rockville, MD and
in Nags Head, NC.
SLA: Thank you Debra for your thoughtful answers and for sharing your beautiful art with us!
"
Technique Tuesday: C - Thru Rulers
Some fancy artists out there will use calipers to help them make adjustments to their work. You don't get fancy around here, just useful and sometimes cheap. This trick of mine falls into both categories. I use those cheap and abundant clear rulers you can pick up anywhere to measure both my subject and my paintings when they get out of whack proportionally. That is to say if I am working at life size. Normally I have a really strong sense of proportion when I am drawing or painting, but I don't always "nail it". That's when I pull out my trusty little ruler. It is such a useful tip that I keep one of them always nearby with my brushes while I am painting.
A note of caution: if you are painting from a model, they usually prefer for you to ask permission to measure them. Just saying.
Technique Tuesday: Drawing Revelations with Dan Thompson
In August I attended yet another workshop with Dan Thompson. 2 actually, back to back. Both of them on drawing. I see Dan as a cosmic guide on my life long journey as an artist. He leaves little bread crumbs of wisdom to follow on the path to improvement. Most recently he left me with two life changing concepts. The first is the revelation of what "closed" and "open" drawings are. Closed drawings are those with specific contours. They are precise, drawn from the outside in and do not allow much room for alterations. Open drawings are the opposite. They are built from the inside out. They are more mass than contour, they are flexible. They are forgiving. I had never heard these terms before, perhaps because I did not attend a particularly traditional art school. Hearing these terms allowed me to understand my own frustrations with my drawing--most noticeably a tendency for strong contours. To think that I could simply reverse engineer my drawing technique to get at the quality I want in my work was literally mind blowing! And the last revelation I received from Dan's workshop was to approach each effort in drawing and painting as if making a "proposal". If you get it wrong, so what! Just alter your proposal. Brilliant right? And it totally takes the pressure off.
Technique Tuesday: Super Glue and Richard Schmid
On the latest podcast of Artist Mentor's Online, artist Molly Schmid shares that her father, Richard Schmid (author of Alla Prima and Alla Prima II) often rearranges live flowers on still lifes by gluing them into place as needed to achieve the best composition. Genius, right? Well that's why he's Richard Schmid.
You heard it here first folks. OK, second. To get your own copy of Richard's Alla Prima II before its completely sold out click here.

